.png?width=212&name=Prospect%20by%20IrisVR%20Black%20(1).png)
Today’s the day! Prospect 2.2 is here.
With Prospect 2.2 we’ve made improvements to your in-VR experience. These new additions simplify the immersive design review workflow and boost productivity by keeping everyone on the same page.
Here’s what you can do with the latest release.
Create your own VR walkthrough
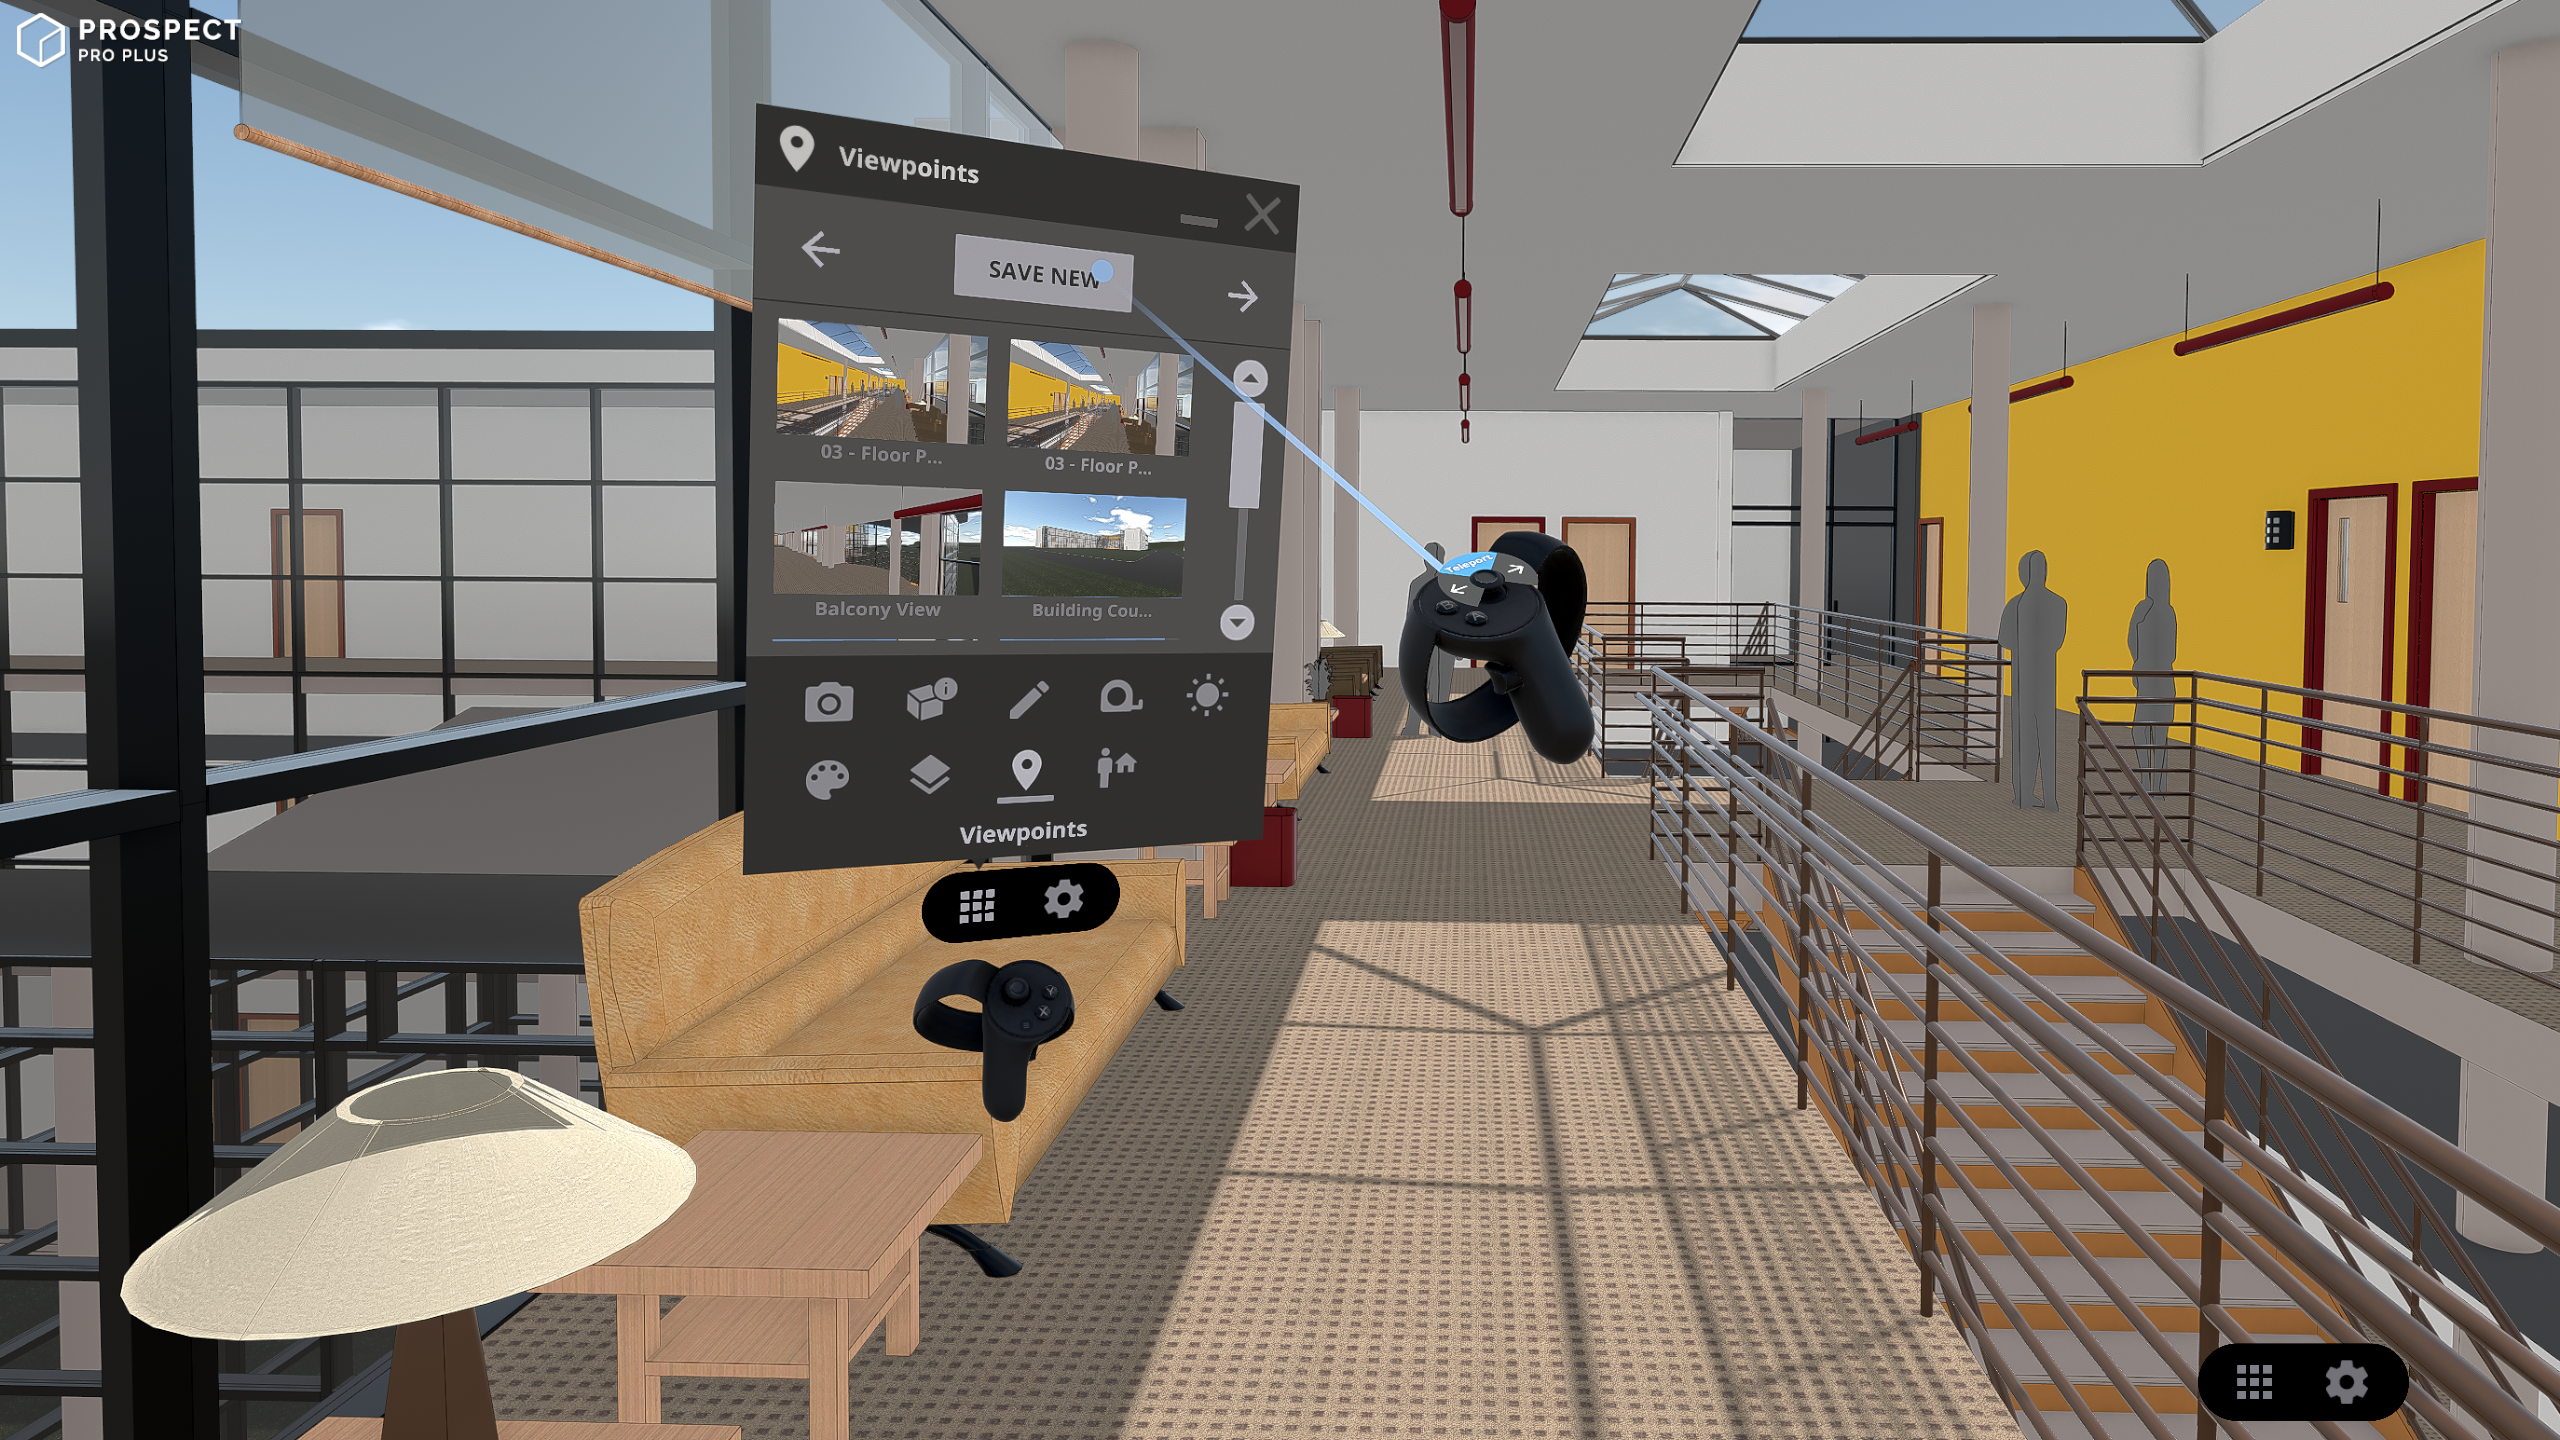
We love Viewpoints because they are an essential tool for presenting in VR. With Viewpoints you can take a client on a VR walkthrough by saving and curating preset locations within the model. Viewpoints are handy when you’re not ready to present the full design or just need approval on specific sections of model.
With this release, we’ve added in the ability to create your own VR walkthrough using the “Save Viewpoint” feature in VR. Now it’s easier to create Viewpoints - and you can even do so on the fly during your design review session.
Navigate to your first desired Viewpoint and click “Save New” to start creating your VR walkthrough.
Creating a Viewpoint in Prospect will save the following information:
- The exact location of the Viewpoint (including the camera angle)
- The layer state – this means any objects, materials or elements can be hidden or revealed for each Viewpoint.
- Your display settings - choose to display your model with or without materials and outlines.
- Sun settings - these help you perform sun and shadow studies.
- Section positions - this is handy when you’re presenting building sections.
All Viewpoints now include thumbnails for easier management. Thumbnails are automatically generated when you save a new Viewpoint in VR or when they are imported from Revit, SketchUp, or Grasshopper. Additionally, we’ve added Viewpoint thumbnails to your in-VR experience and to the Project Desktop Library.
Save design review feedback in VR with annotation persistence
The annotation and markup tools are great for capturing feedback during an immersive design review session. With this new release, we’ve added annotation persistence to keep those notes from disappearing when the meeting ends. Now if you make an annotation in your model, exit your VR session, then re-launch the file, your annotation will remain exactly as it was before. This makes it easier to hop between different files or jump back into the design when you need to review the notes.
Annotation persistence includes:
- Annotations & markups
- Sun settings
- Model position
- Flagged elements
- Sections state
Customize the VR walkthrough Experience with in-VR Settings
When you’re presenting to a client and the walkthrough is going great, the last thing you want to do is leave the VR session to change your settings. In order to help keep the walkthrough on track we built a dedicated settings panel that gives you more control over your in-VR experience.
New in-VR settings include:
- VR tutorial - In our last release we created a short VR tutorial to help you quickly onboard team members and clients. Now you can re-launch the tutorial anytime.
- Teleportation style - Depending on how you prefer to move around in VR and the type of model you’re immersed in, you can now choose from two navigation options, curved and straight.
- Flight increment - By default the flight increment is set to 1 meter, which you can change by increments of .5m in the menu.
- Comfort mode for Scale Model Mode - This option reduces the field of view when you zoom into the model in order to make the viewing experience more comfortable.
- Audio - We’ve added subtle sound effects to the VR menu to better indicate interactions with it. You can turn that on/off as needed.
These new settings make it easier to customize your experience and have a smoother walkthrough that matches your client’s preferences.
Continued Graphic Improvements
Before and after of 2.0 (February) and 2.2 (today).
With this release we made improvements to texture loading and material detection. Additionally, we’ve incorporated auto-exposure and tone mapping for more realistic lighting when you’re outdoors in VR.
Want to give all these new features a try? Update to 2.2 now or start a free 45-day trial of Prospect.
If you're new to VR and need to buy a headset before getting started, we've got you covered. Take this quiz to find out which headset is right for you and your team to use with Prospect.
