.png?width=212&name=Prospect%20by%20IrisVR%20Black%20(1).png)

Update: we've built tons of features into Prospect that can help you better navigate through virtual reality, including Viewpoints. Read more about Viewpoints here.
At Iris, we deal with a wide array of visualizations from single rooms to entire city blocks. Sometimes it’s difficult to navigate to certain points of interest if they are far away or difficult to find, so we developed a “spawn point” system for Unity that allows for instant teleportation to any number of pre-defined locations within the model. We also packaged this system up in a nice little bundle available for you, in case you want to use our spawn solution to inhabit your own designs. To use it, simply double-click the Unity package file while your project is open in the Unity Editor.
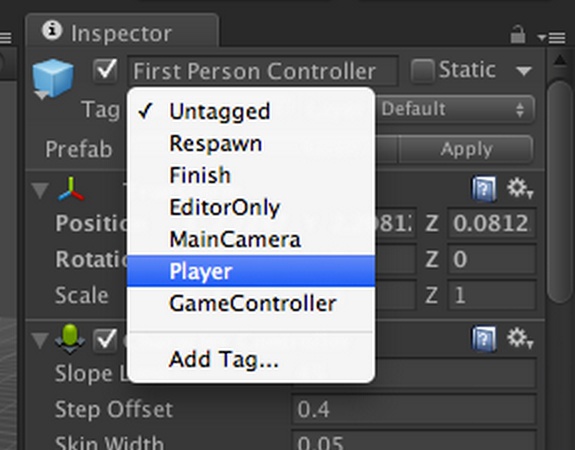
The system requires an instance of SpawnManager in the scene’s hierarchy. Additionally, you have to set your main player object’s tag as “Player” in the Inspector. The following screenshot shows you exactly where to set the tag:
Once you’ve finished the preliminary setup, you simply need to add spawns. Click and drag as many instances of Spawn as you want from the Prefabs folder to your scene. Each spawn will be represented as a grey sphere, but fear not; the rendered shapes won’t appear to your player, they’re only guides for you to use in the editor to position spawns visually.
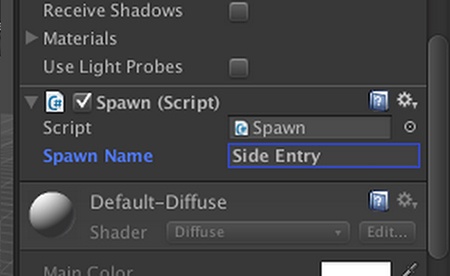
Each instance of Spawn will have a script attached to it with a Spawn Name field in the Inspector. Whatever you type in this field will be how the spawn point is labeled in the generated user interface during the simulation, so be sure to name it something that makes sense contextually. For instance, below is a spawn that we’ve named “Side Entry:”
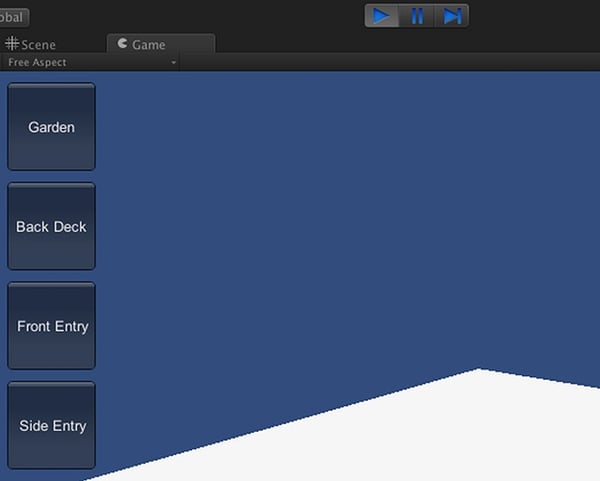
Once you’ve placed one or several spawns around your scene, go ahead and press play to take it for a test drive. You’ll see a graphical user interface (GUI) generated as soon as the game starts, with a button for each spawn you created displayed along the left side of the screen (a result of the OnGUI function in the SpawnManager script). It should look something like this:
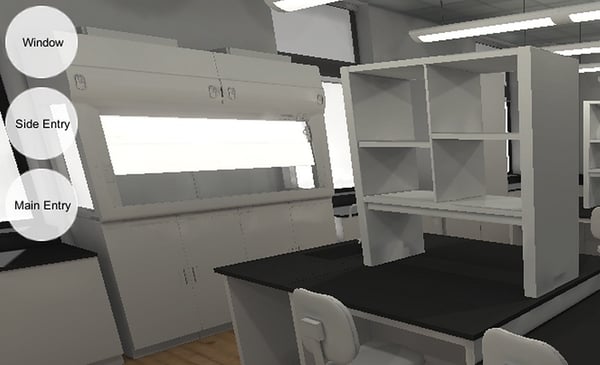
That’s all there is to it! Whenever your user clicks any of the spawn buttons, it will instantly teleport them to wherever you placed that instance of Spawn in the editor. This system is pretty minimal at its core, but there’s a lot you can do to quickly and easily expand and personalize it. For instance, because it uses Unity’s built-in GUI system, you can create a new skin using the Inspector and make your buttons automatically use your textures in just one line of code, like we’ve done in our web demo (pictured below).
We’ve used this small system to get contextual spawn points up and running quickly in several of our Unity demos, and we hope it can save you a little time as well. Happy developing!
