.png?width=212&name=Prospect%20by%20IrisVR%20Black%20(1).png)
Viewpoints can guide your walkthrough by helping you determine the narrative of your building - and letting you communicate this narrative on your own terms. But you may be wondering how to put this architectural storytelling to work.
The good news is that Viewpoints is one of Prospect’s easiest features to use. We’ve laid out the simple process of using Viewpoints throughout your workflow and in your design review sessions.
How Viewpoints Fit Into Immersive Walkthroughs
In planning out your client presentations, it can be helpful to take a step back and remind ourselves why Viewpoints are valuable to our immersive reviews at all.
After all, isn’t the walkthrough itself going to help you relay the direction of your project?
Using immersive views alone can already lead to huge improvements in communicating your vision to your client. But when you position these views within the framework of a personally curated, predetermined outline of your intended narrative, these views become even more compelling in context.
This predetermined outline not only delineates a clear narrative for your design, but can also be dynamically adjusted while in the virtual environment. Within VR, new important views can be easily added, and older superseded views can be easily removed.
How to create Viewpoints for your next VR walkthrough
After deciding how to communicate the space, creating the Viewpoints to tell your story is easy. If you’re a SketchUp, Revit, Rhino, or Grasshopper user, the 3D views from your model are automatically converted into Viewpoints.
For more information on how these views are imported, visit our help center. Otherwise, it only takes a few minutes to set your Viewpoints from within the VR environment.
Here’s how with Prospect:
- Open your 3D model in Prospect.
- Select Viewpoints from the VR menu.
- Navigate to the location in the model you'd like to create a Viewpoint for.
- Click “Save New”.
- That’s it!
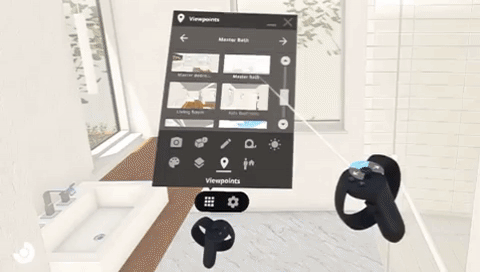
Creating a Viewpoint in Prospect will save the following information:
- The exact location of the Viewpoint (including the camera angle).
- The layer state – this means any objects or elements can be hidden or revealed for each Viewpoint without affecting their visibility in other Viewpoints.
- Your display settings - you can choose to display your model with or without materials and outlines on a view-by-view basis.
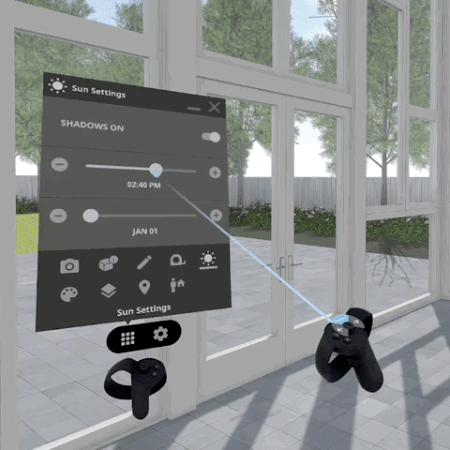
- Sun and shadow settings - these help you perform sun and shadow studies on a view-by-view basis.
- Position of section cuts in Scale Model Mode - this is handy when you’re presenting building sections.
As you can see, creating your Viewpoints is super simple. And once they’re created, they live in your project library so you can easily access and review them as you continue designing.
Selecting Your Viewpoints for the VR Walkthrough
Creating Viewpoints is probably the easiest step when it comes to curating your walkthroughs. Actually deciding which show-stopping moments to feature in your design walkthrough may be more difficult than creating the images themselves.
Let’s discuss some ways you can brainstorm the direction of your walkthrough.
Decide on the story you want to tell
You’ve put a lot of thought into your project’s vision, but now how do you communicate that to someone who may not be as familiar with your design process?
How do you show that this design was created to reflect the needs of the individual, family, community, or organization that will soon be inhabiting the space?
When deciding on how you want to tell this story, try to showcase the intended use in each space. Think about how you see your client moving through the space and interacting with its features and tailor your Viewpoints to create a walkthrough that communicates this for you.
Take a walk in your clients' shoes
A really tight story will help sell clients on your design and give them the opportunity to express their opinions. If you’re having a hard time determining the best way to present your model, it may be useful to jump into VR and experience the model for yourself.
Put yourself in your clients shoes and try to see it with fresh eyes, thinking critically about how to best highlight the flow of the space and important features. When you get to a point in your model you’d like to show off, you can create a Viewpoint from within VR.
Consider your current design phase
The phase of your project will largely determine what Viewpoints you want to focus on. If you’re meeting with a client for the first time in Concept Design, your process in VR is going to be very different than your last meeting before construction begins. If it’s your first presentation, you probably want to focus on the general direction and flow of the space.
Your Viewpoints will capture the layouts and structural foundation, rather than specific design elements. You can direct attention to these higher-level design items by taking advantage of White Model Mode and turning off material visibility.
As your project progresses, you can add or replace Viewpoints with views of material finishes or plumbing fixtures - the design details that will really bring your building to life.
Whatever phase you are in, take some time before the meeting to consider what conversations will be most useful to you, and curate your Viewpoints to ensure you hit on each one of these discussion points.
The 3 Stages of Using Viewpoints in Your Meetings
Now that you’ve decided on how you want your story to be told, it’s time to actually tell it. This can be done in three easy steps:
1. Testing the experience
First and foremost, you’ll want to spot-check the model for inaccuracies or elements that need to be fixed back in your 3d modeling platform. If you find anything that needs further refinement, you’ll want to run another test VR walkthrough after making changes to your model to be sure they look good in VR. During this test, progress through your Viewpoints in order one last time to get a feel for the full narrative. If you need to edit the order or delete Viewpoints, this can be done from your Prospect Library.
2. Taking control of the VR walkthrough
(Using Presenter Mode in Prospect while the client is in VR)
Viewpoints aren’t limited to the pre-design review phase of your engagement with clients. During the VR walkthrough with your client, Viewpoints serve as your step-by-step tour of the entire space.
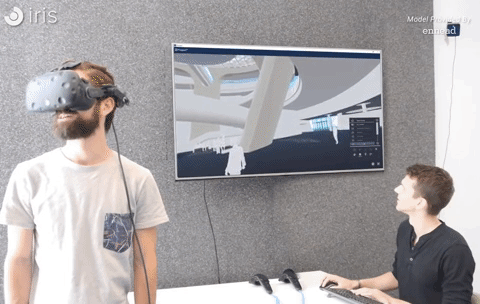
This is a super handy way to use them, especially if you want to take full control of the presentation and navigate your client through the Viewpoints with Presenter Mode. Presenter Mode lets your client remain in the VR environment while you manage the progression through each Viewpoint from your desktop. You can decide how long to stay at each Viewpoint, where to turn, or how to navigate.
This is especially useful if it’s your client’s first time in VR, where they may be excited and easily distracted when they first enter the virtual world. Your Viewpoints will help keep things moving.
Viewpoints can also be used as a way to document newfound important spaces. For instance, let’s say you are showing your client their future home and you transport them to a living room Viewpoint. When they’re done viewing the living room, they walk down a hallway and realize that they’d like to add 2-3 niches for vases and other decorations. You could then make a Viewpoint at that exact spot in the hallway, saving it to reference when making changes back at your desk.
3. Following up with your client
Once you’ve communicated and discussed your project’s direction, a quick debrief with your client can be useful. Make sure you review any newly determined Viewpoints and are on the same page about the changes and suggestions discussed in your meeting. Before leaving, confirm next steps and client expectations to ensure your next meeting will be a success.
UPDATE: With the release of Prospect 2.4, you can automatically create a Report during your design review session and download it as a PDF. Reports contain screenshots, flagged elements, notes, and action items, assuring that you can move forward with a clear idea of what comes next for your project. Read more about Reports here.
Pro Tips - A few things we’ve learned from VR presentations
Viewpoints will undoubtedly help determine the outline of your meetings, but there are other considerations you can take while leading your client through these Viewpoints that will also help your productivity.
- As you review the design story, have someone take notes of your client’s thoughts and suggestions. This is useful when reviewing your model back at your desk, so you know exactly what spaces require some work.
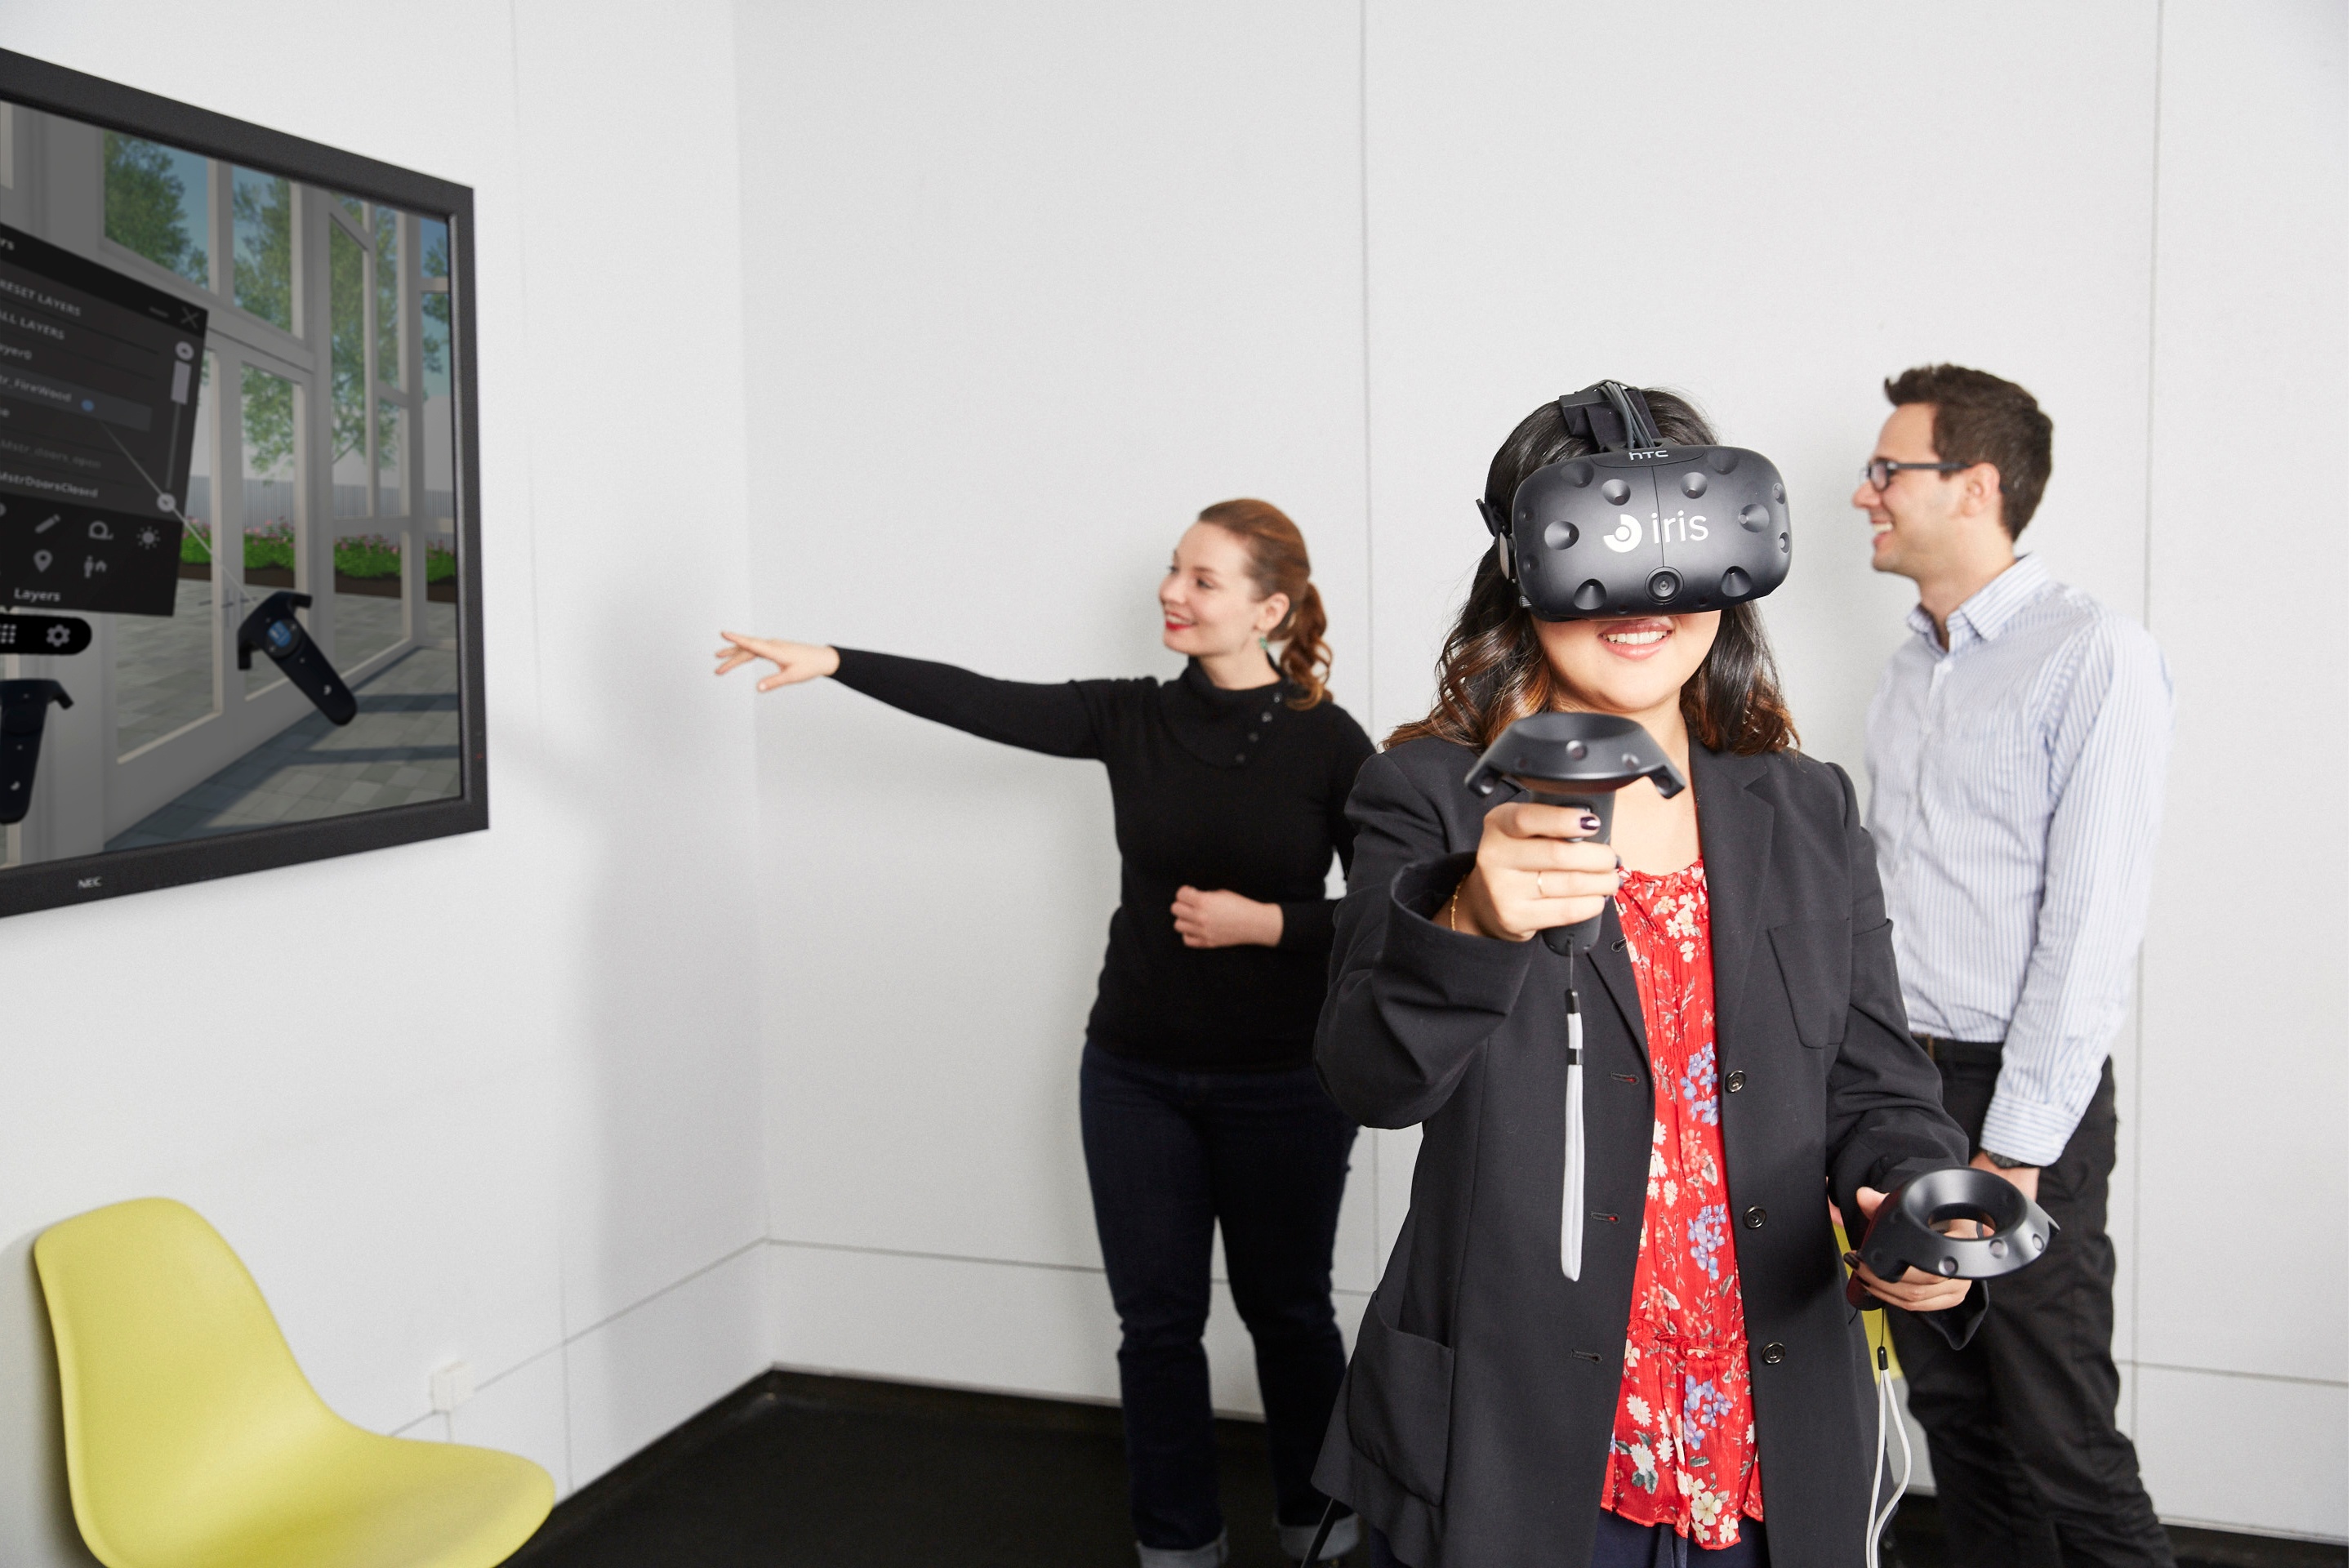
- If you have more than one client at your meeting, mirror the VR experience on a TV screen so everyone can be a part of the story. We’ve found that this really helps with client engagement throughout the session.
- If your clients are comfortable in VR, encourage them to use in-VR tools like Annotation and Flag Element to record where they want to see changes. During the meeting you can take a picture of these annotations and flagged elements to save for later review.
Once you master Viewpoints, you have a really solid foundation for your VR design review sessions. Since communicating your vision is top priority when it comes to client meetings, Viewpoints are a great place to start. Hopefully we’ve shown you how easy it is to incorporate these tools in your review sessions.
