Our latest update to Prospect Pro lets users export a list of flagged elements as a CSV file for later review. This feature can help you and your team have more efficient review sessions using your BIM model. Below, we outline the steps to get started and specific workflows for Revit, Dynamo, and Navisworks to VR.
Update as of November 2018: We now have a plugin for Navisworks - click here to learn more. Additionally, with the release of Prospect 2.4, you can automatically create a Report during your design review session or VR Meeting and download it as a PDF. Reports contain screenshots, flagged elements, notes, and action items. Read more about Reports here.
Step 1: Inspect and Flag Elements in VR
Prospect allows you to select elements using the Inspect Element tool and flag them in red so that you can document what needs further review. We have full support to inspect the properties of elements for all of the formats we have integrations with, including SketchUp, Rhino, Grasshopper, and OBJ, though this post will focus on Revit.
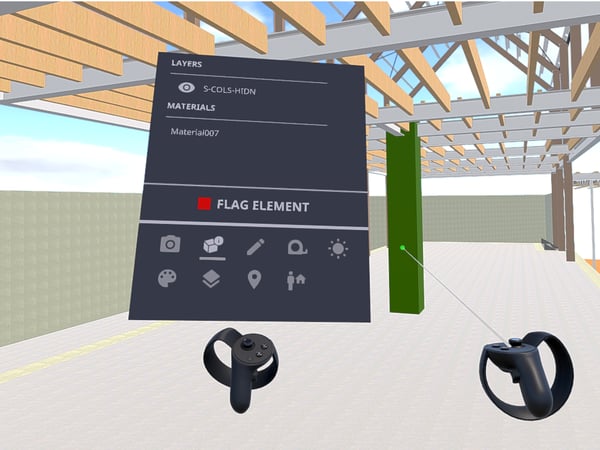
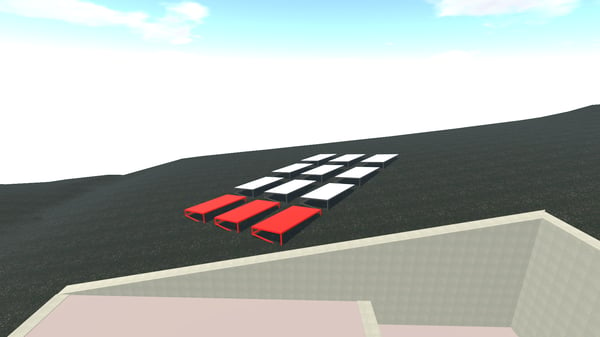
To start, perform a walkthrough of your model and use the Inspect Element tool to flag elements that need to be reviewed. They will turn red once they're flagged, like below.
Step 2: Generate A Report of Flagged Elements
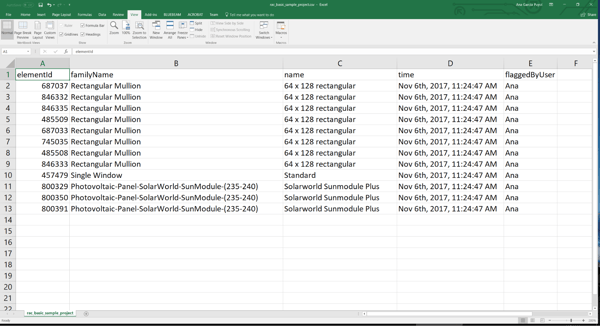
Once you're out of VR, go into your Prospect Library and select the Revit file you were viewing. When you open the Flagged Elements setting, you'll see a list of element IDs and their names. From there, you can export the report as a CSV. The CSV will contain the element ID, the family and element names of each element, the time it was flagged, and the username of the individual who flagged the element.
Step 3: Use the Report in Revit, Dynamo, or Navisworks
Once you've generated the report, you can use it easily in Revit, Dynamo, or Navisworks.
Using the report with Revit:
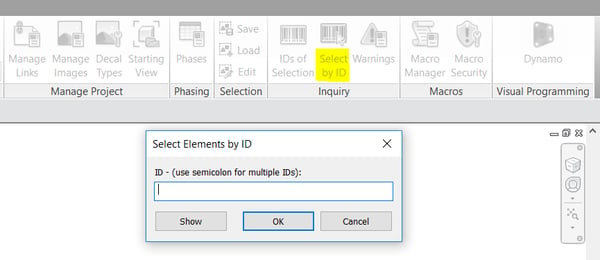
Using this list, you can copy the element IDs into Revit to find the objects there. Go to Manage > the Inquiry tab > Select by Id and paste the element IDs. This allows you to quickly identify the elements in your model.
Using the report with Dynamo:
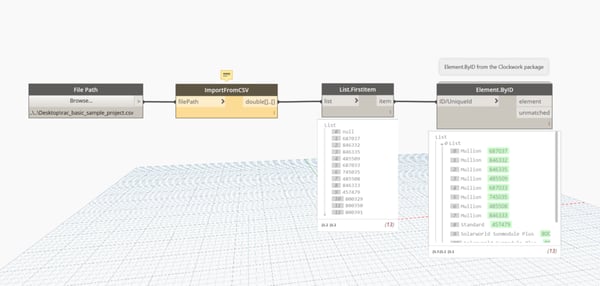
If you are a Dynamo user, you can create a simple definition that can read all the flagged elements from your review session.
Use a File Path node and browse to the location where you saved your CSV file. Next, add an ImportFromCSV node. Select the first list, which represents the column with the Element IDs, by using the List.FirstItem node. Finally, install the Clockwork Package and use the Element.ByID node to find the flagged elements in the Revit file.
The Navisworks workflow:
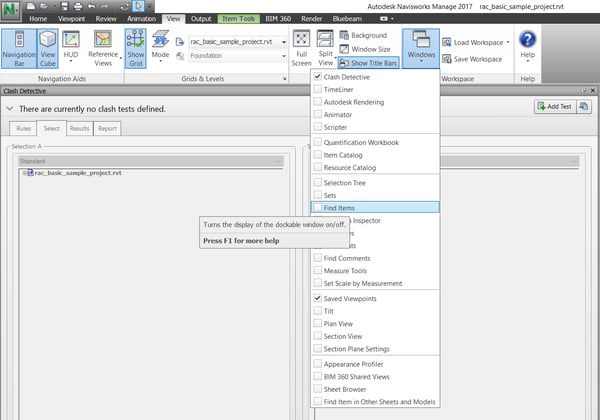
To find the flagged Revit elements in Navisworks, simply click on View > Workspace > Windows and check Find Items in the dropdown.
In the dialog, select Element ID under Category, select Value under Property, set Condition to =, and under Value paste the element ID of the object you'd like to find. After that, click on Find First. Once the element is selected, you can click on Zoom Selected in the dropdown under Viewpoint > Navigate > Zoom Window.
In the future, we’ll continue to add additional support and modifications to this feature that will make your VR review sessions more productive, and in the meantime we’d love to hear your feedback. Please reach out to our team directly if you have any questions or comments!
.png?width=212&name=Prospect%20by%20IrisVR%20Black%20(1).png)
