.png?width=212&name=Prospect%20by%20IrisVR%20Black%20(1).png)

We're big believers that VR is the natural next step for BIM, since it allows you to instantly comprehend models as already built spaces. Clash detection and coordination meetings in an immersive, totally true to scale environment take it one step further—everyone can see clashes as if they’re already built, making errors obvious and easy to spot.
Many BIM and VDC teams see VR coordination meetings as an essential part of their workflow. The Anglian Water @one Alliance, for example, saved £15,000 on avoided rework costs by spotting that an operator kiosk they were building was too small during a virtual walkthrough.
But if you're new to VR, how do you get started?
In this post, we’re going to outline the workflow for bringing Navisworks files into VR in one click with Prospect. We’ll also do a deep dive on best practices for hosting visual clash detection meetings and VR walkthroughs.
Running coordination meetings in true-to-scale VR can take your collaborative capabilities to a new level.
An Easy Navisworks to VR Workflow
To get started, you’ll need access to Navisworks, a VR headset (the Oculus Rift S, Oculus Quest, and HTC Vive Pro are some of our favorites), as well as Prospect, our tool for immersive model review and collaboration (you can try Prospect free for 14 days).
Here’s the step-by-step workflow:
- Open your model in Navisworks.
- Find the “IrisVR” tab and click “View in VR”.
- Select exactly what Viewpoints and BIM metadata properties you want to import into VR.
- Wait a few seconds for Prospect to automatically convert your model into a VR experience.
- Now, in Prospect, click “View in VR” and put on your headset!
This quick tutorial video shows you the workflow in action:
How to Perform Clash Detection Walkthroughs in VR
Now that you know how to bring your Navisworks files quickly and easily into VR, here’s a step-by-step guide for performing visual clash detection and model coordination meetings in VR, as well as some tips for how to make the most of your time.
Below, we break it down into three phases: before, during, and after your meeting.
Before the meeting:
1) Perform your usual clash detection workflow in Navisworks, and make sure to save your clashes as Viewpoints in Navisworks.
Run Clash Detective in Navisworks Manage to spot your clashes, then save these clashes as Viewpoints in Navisworks. This second step is crucial, because Prospect will automatically convert your Viewpoints from Navisworks into Viewpoints in VR that you can easily navigate to.
2) Select which metadata categories you’d like to launch in VR.
With Prospect, you can choose what metadata categories you want to bring into VR every time you import a Navisworks file. This can include everything from materials and manufacturer data, to budget or construction phasing information, to pressure ratings, tonnage, or other information your team will find valuable.
Bringing custom metadata into VR is a powerful feature for coordination—it brings the info you need into the conversation without ever needing to take off your headset and look back at your source file.
Selecting metadata categories to bring into VR keeps your meeting on task, and allows you to bring key information into the conversation at the click of a button.
3) Launch your Navisworks file into VR.
Self explanatory. Click “View in VR” to jump in - and put on your headset!
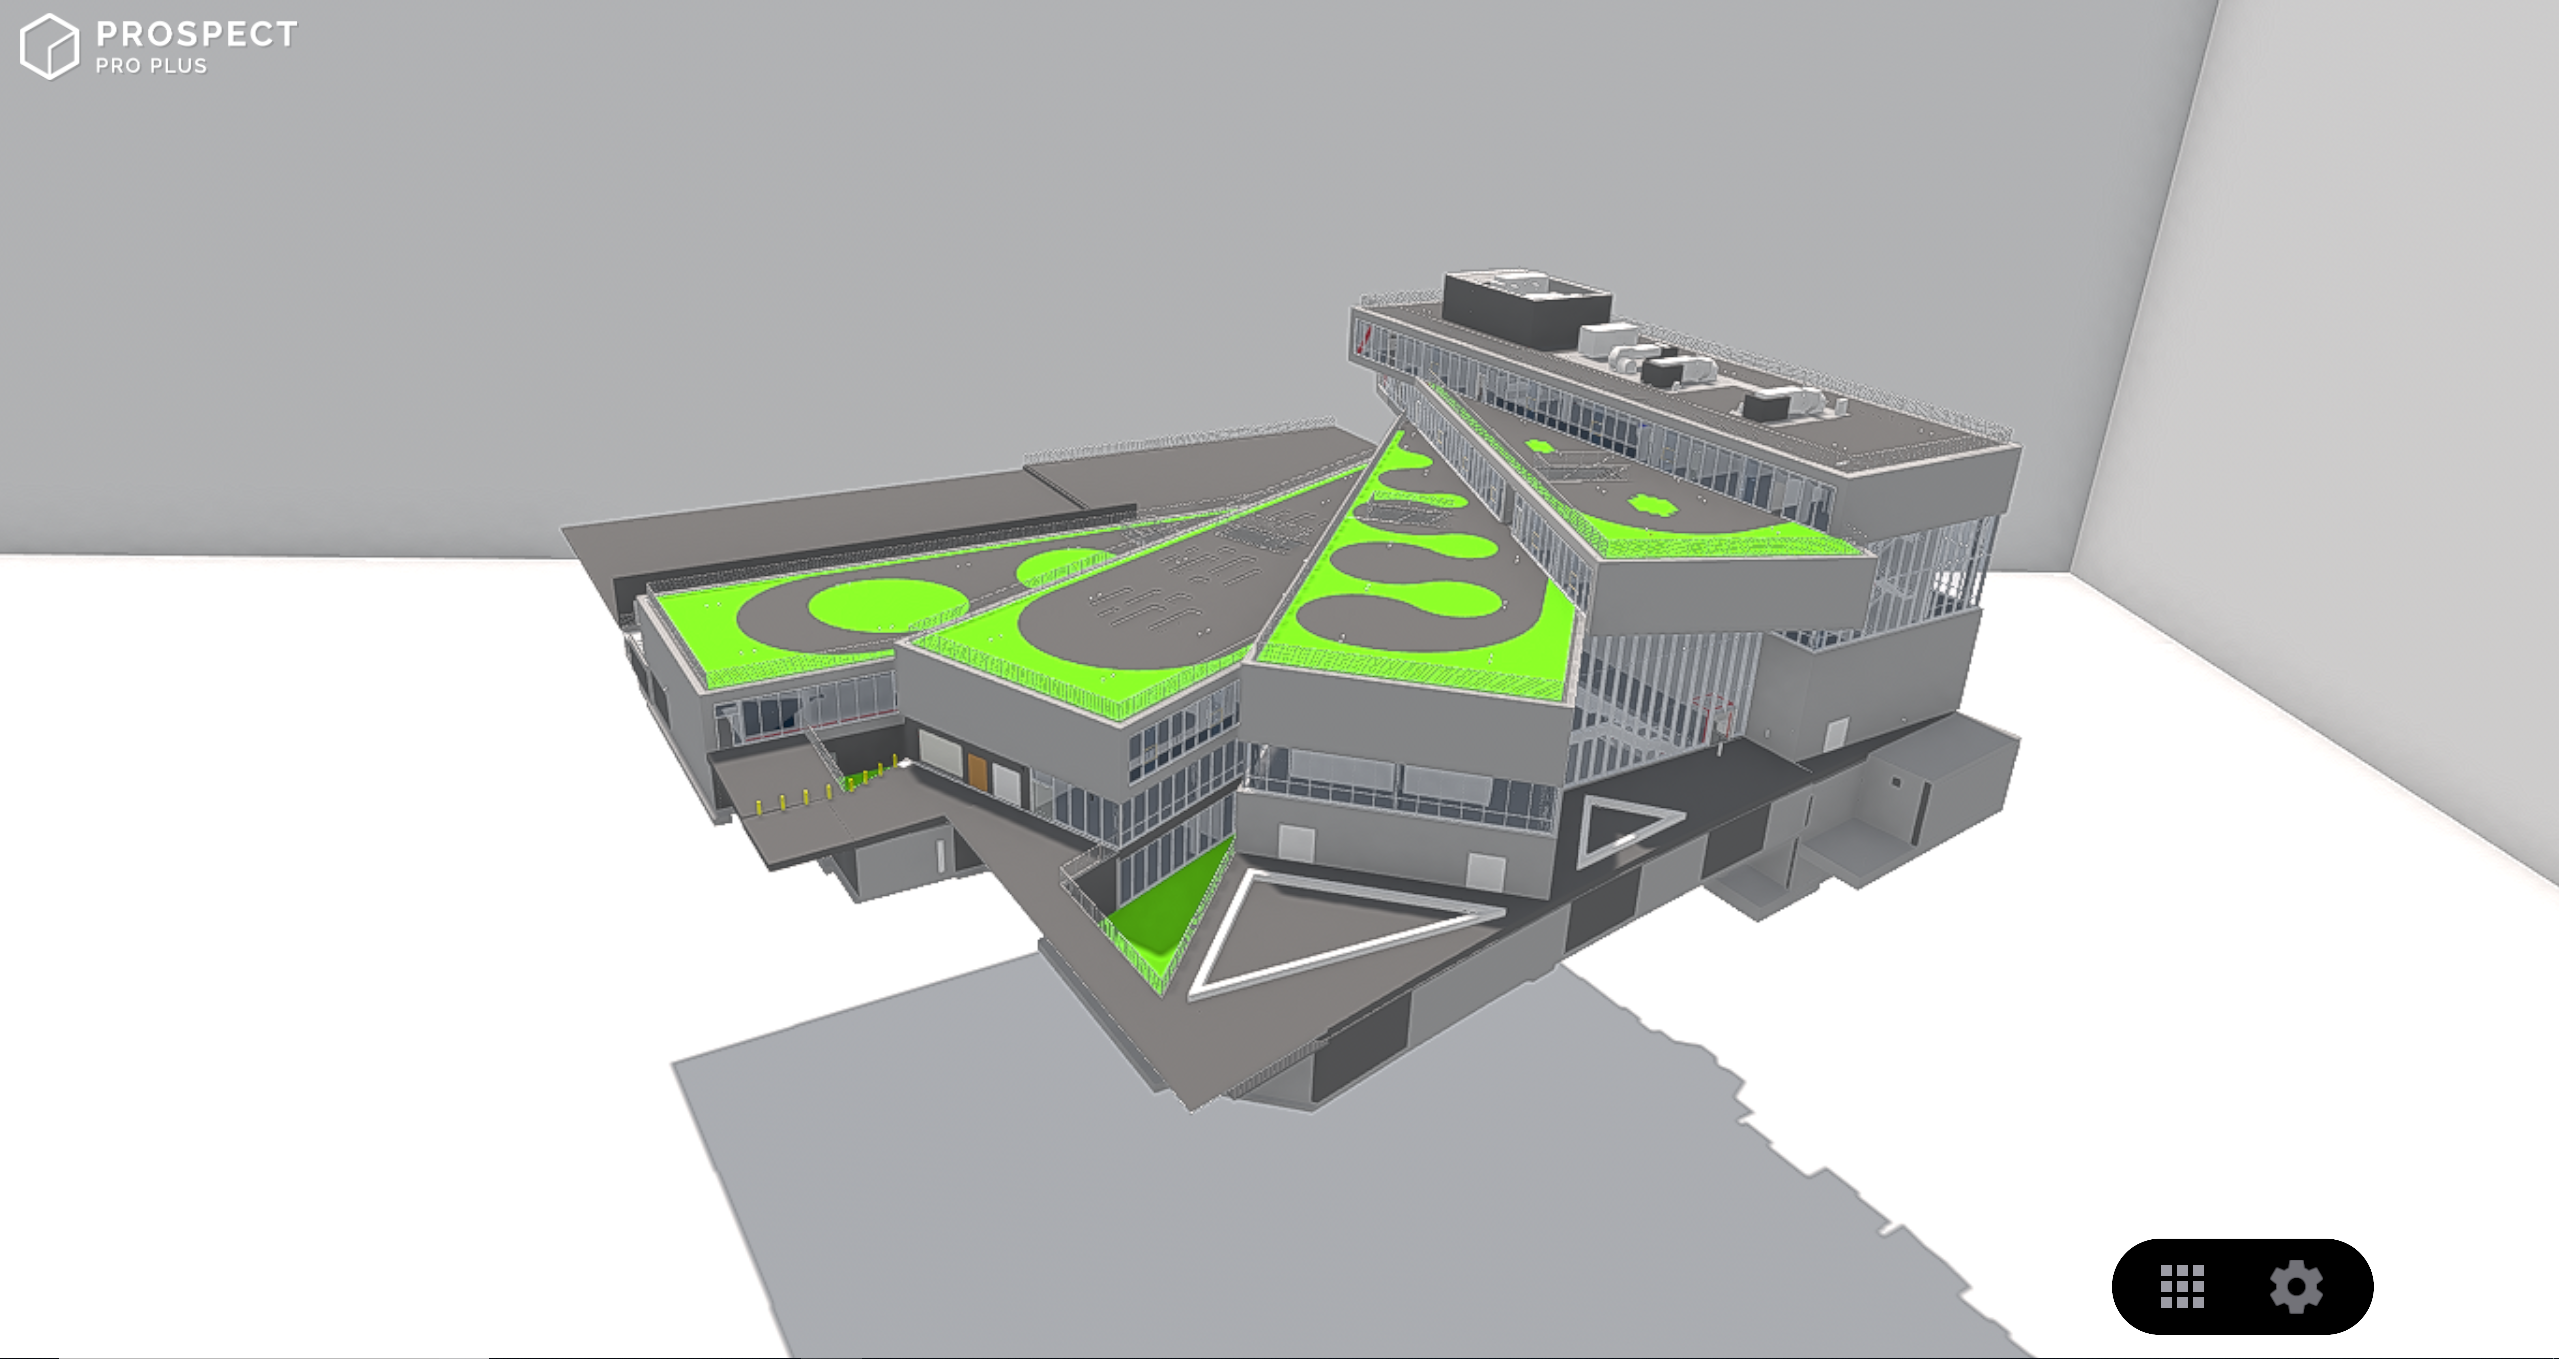
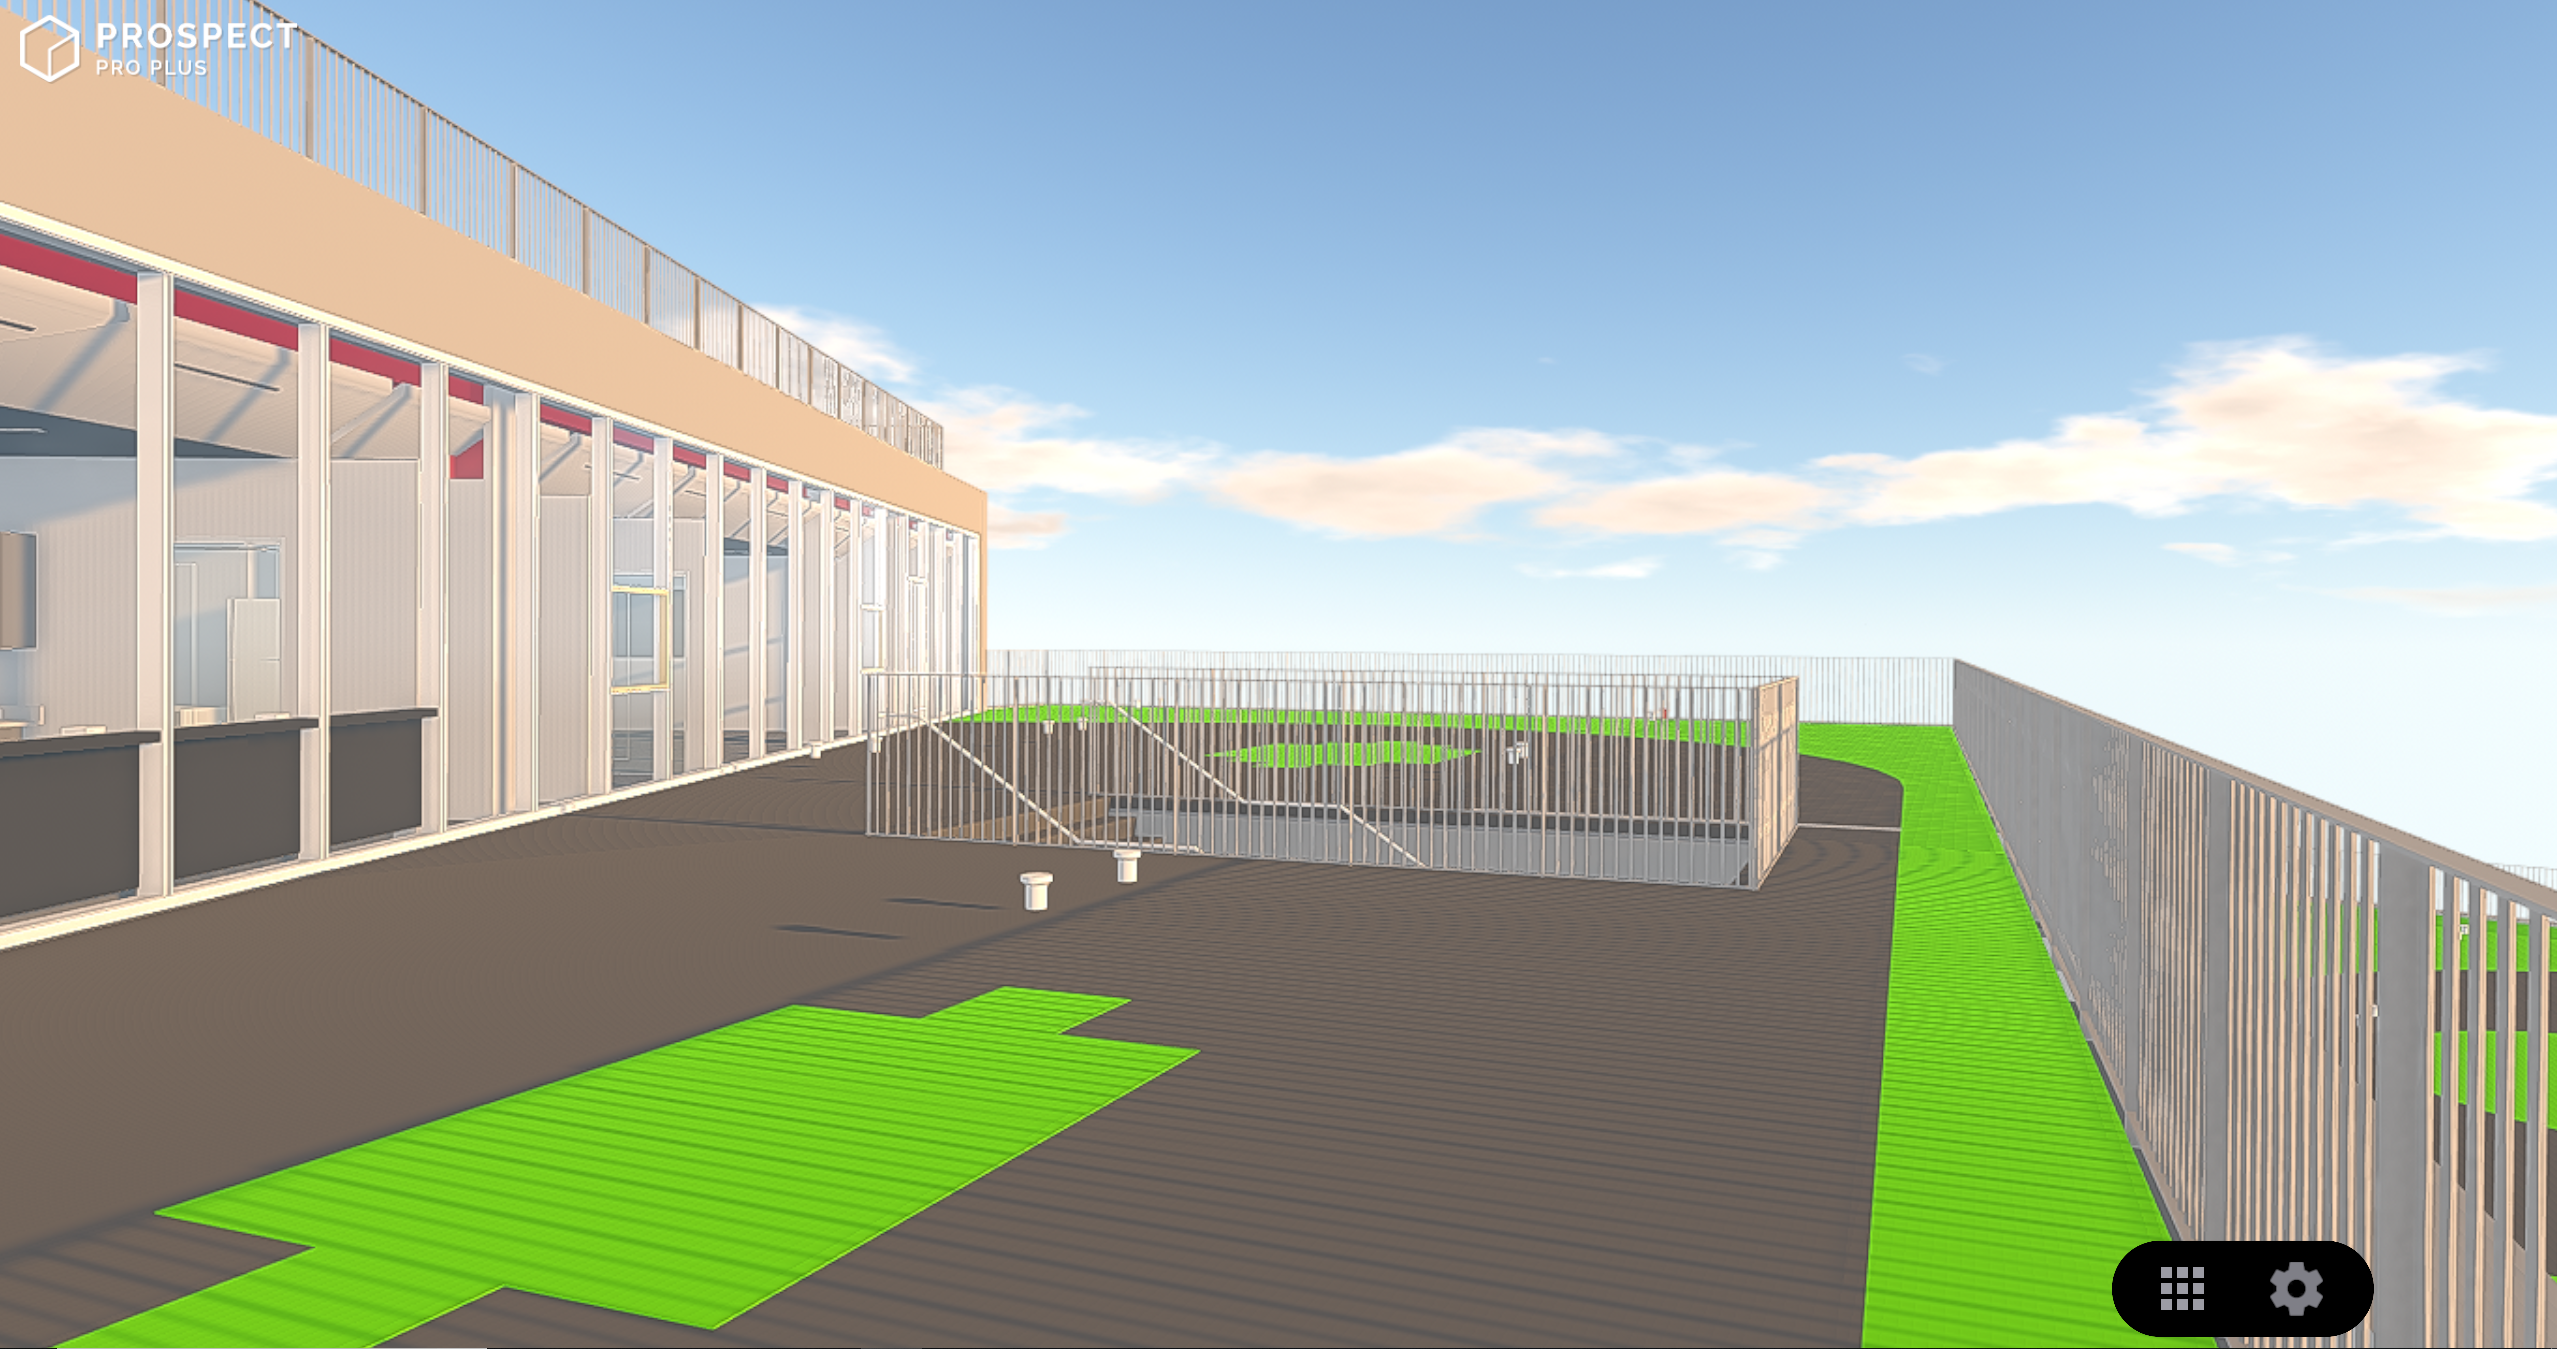
When you first enter VR, you'll automatically view your model in Scale Model Mode.
4) Walk through Viewpoints and create some of your own as you go.
You can easily navigate between existing Viewpoints in VR in whatever order you choose, essentially taking a tour of all your different clashes.
You can also create Viewpoints while you’re in VR, so if you spot new issues or points that need reviewing, you can easily add them to your Viewpoint list. It’s really easy to add new Viewpoints in VR - simply click “Save New” in your Viewpoints menu.
5) Flag, mark up, and document any issues.
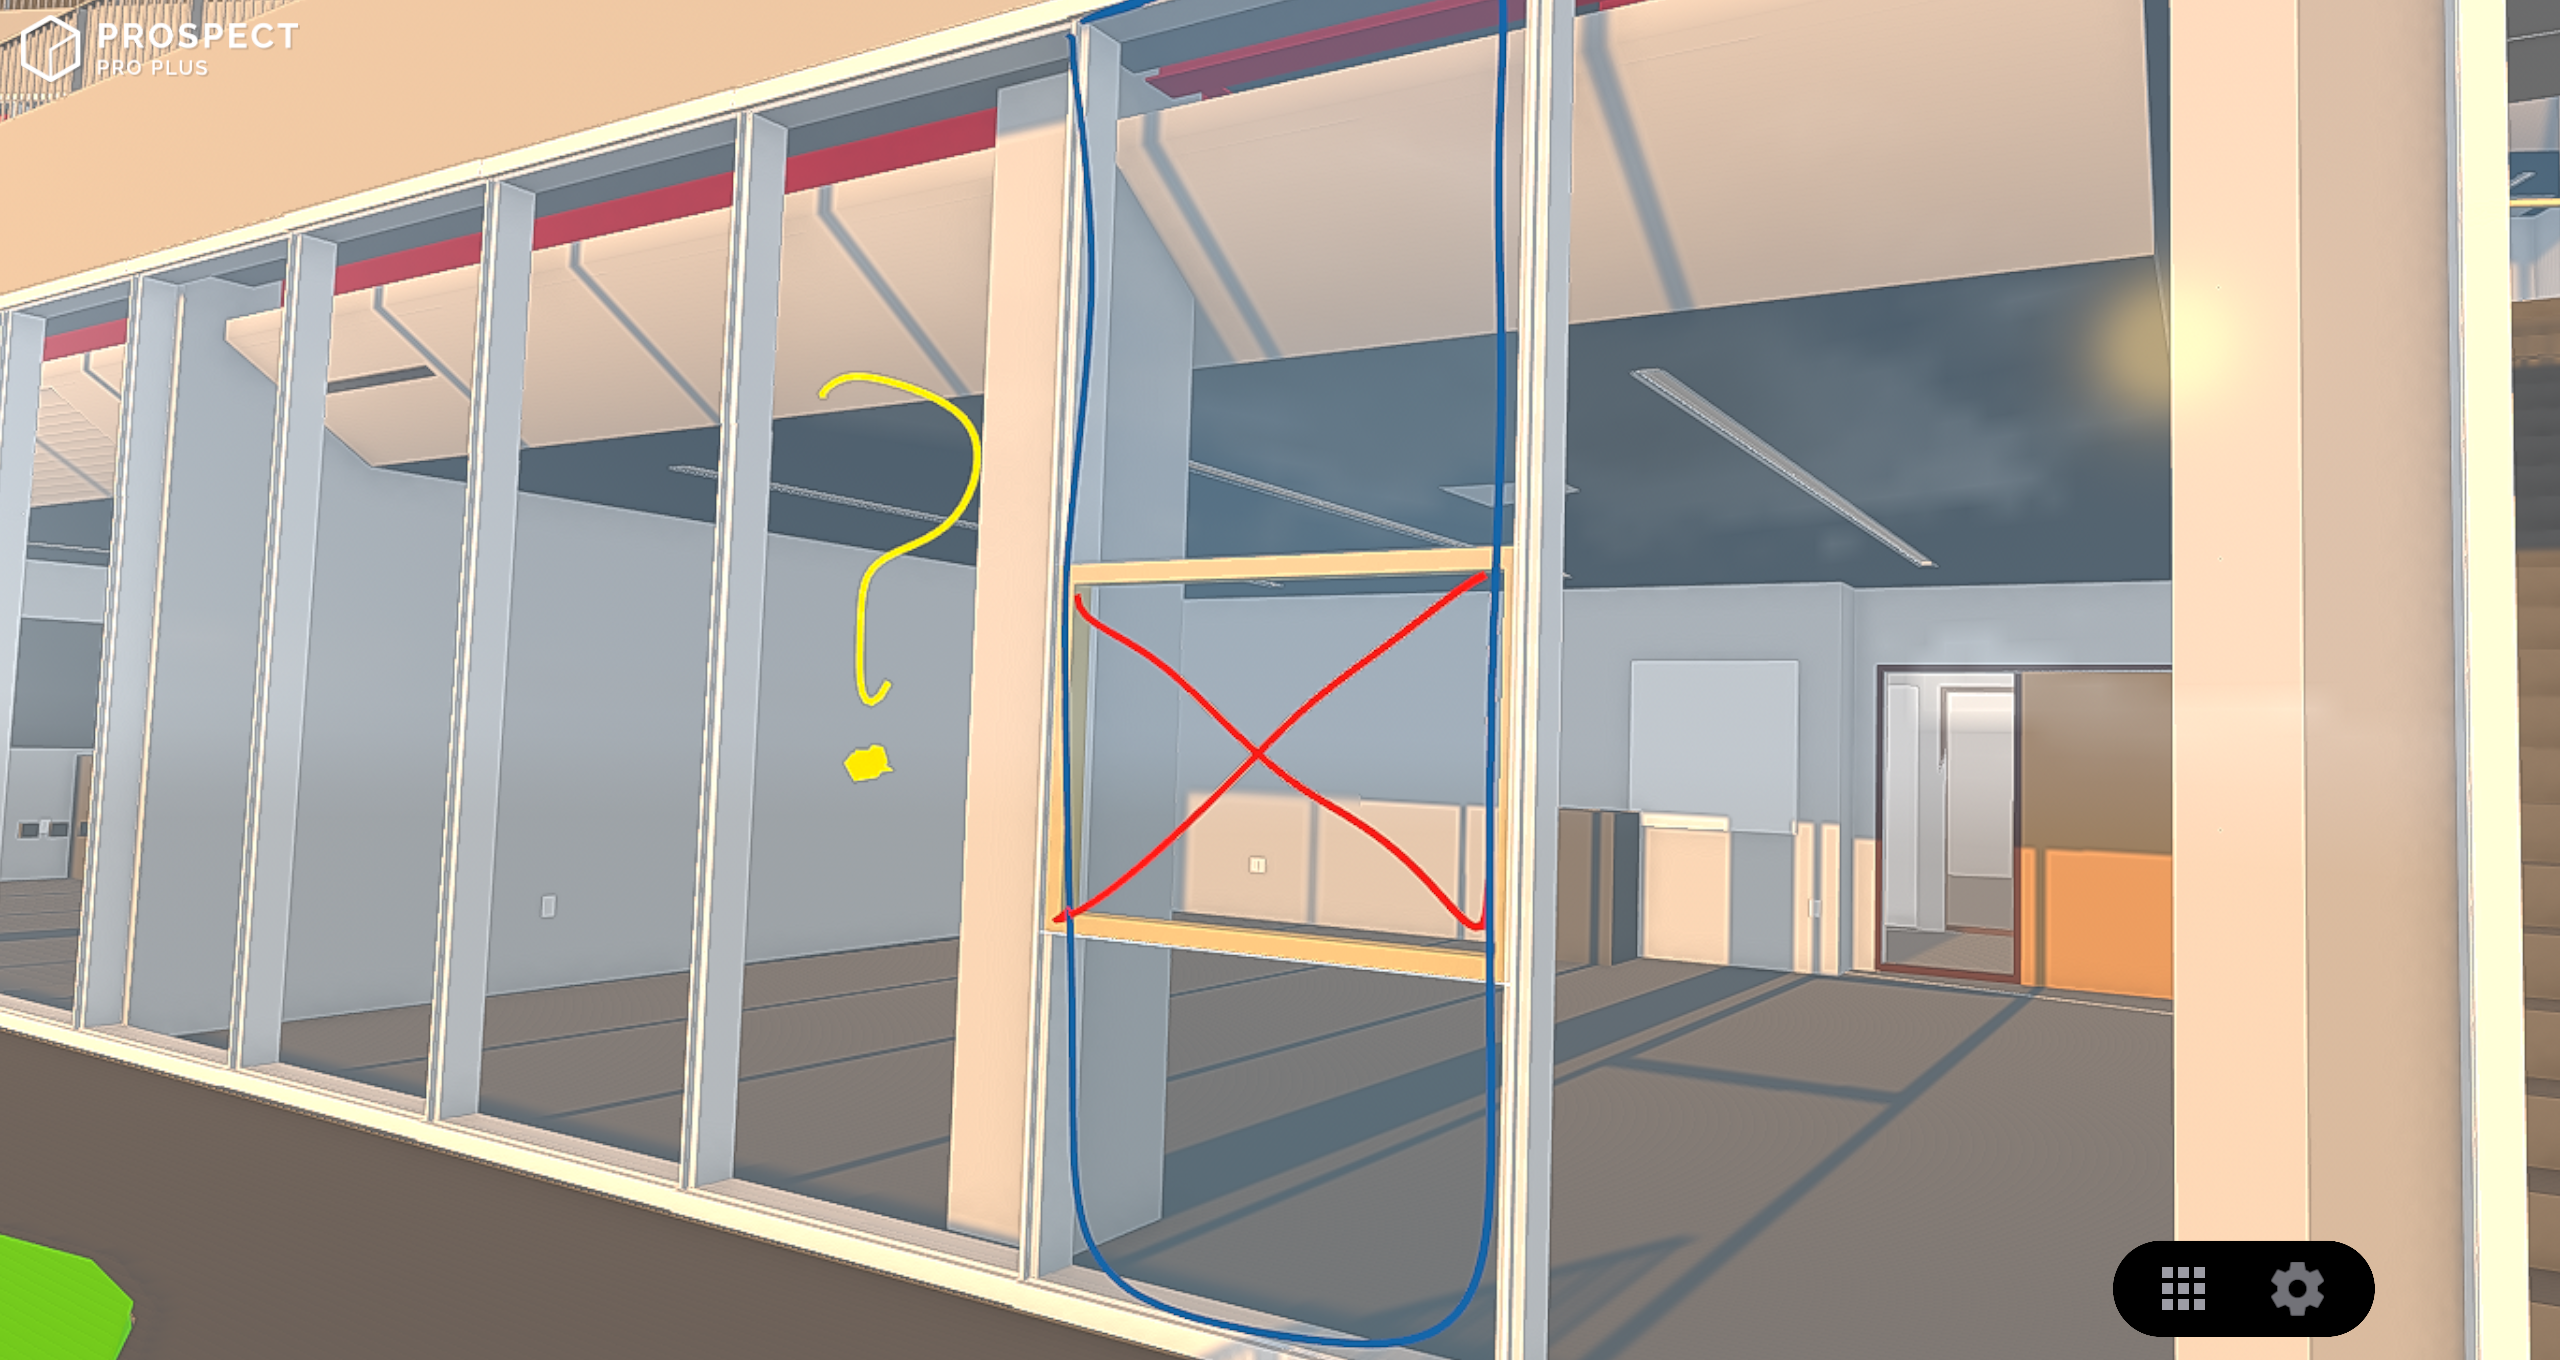
While walking through the model, you can use Prospect’s native tools to call attention to any issues. In particular, you can:
- Flag individual elements that you want to review during your upcoming meeting
- Use the Callouts/Brush tool to add notes to problem areas in need of attention - and even use the various colors to create a color system for coordinating different trades
- Use our Layers tool to show different model configurations, toggle between materials, or view different furniture arrangement
- Take screenshots of your VR experience, if you’d like to share these issues in advance with your team
Pro Tip: Users are able to assign a unique folder for Screenshots for each file in their Library. To keep things organized, it might help to create a new, dedicated folder for Screenshots from one particular file/project.
6) Set up a VR meeting with your trades, colleagues and other stakeholders.
After your initial review of the project, organize your Viewpoints and select those most relevant to your meeting.
Now, click the Sync Project button in Prospect to allow your file to be accessible from any headset—including standalone headsets like Oculus Quest. Once your file is synced, you'll be able to send private email invites to collaborators or create a unique join code that people can use to enter a VR meeting.
During the meeting:
7) Capture Screenshots and 360 Panoramas using the Camera tool in VR.
Documenting your clashes during a walkthrough with stakeholders is great, but being able to revisit them later is key to success coming out of your meeting.
Panoramas captured in Prospect include your markups, flagged items, and layer states made within your model. They’re an excellent way to document conversations, issues, and necessary revisions to revisit later.
8) Take advantage of Prospect’s tools for collaboration.
Use our Gather and Go To tools while in VR to make sure you keep all your collaborators on track throughout your meeting.
Gather will bring all attendees to your location. Go To lets you teleport to another attendee’s location.
These particular tools can be especially helpful if your collaborators are relatively new to VR and keeps everyone in the same proximity; it’s easy to instantly navigate large spaces in VR.
Pro Tip: With Prospect, you also have the ability to help guide users through a VR walkthrough as a Presenter. Simply place the trade or stakeholder in the headset, and navigate them through Viewpoints via Desktop Controls with a keyboard and mouse.
There is even the option to turn off one or both VR controllers (menu and/or navigation) for a participant new to VR. This takes the some of the pressure off that individual learning the controls and allows them to focus on what they’re being shown within a model.
9) Set yourself up for success with the Inspect Element tool.
We recommend using the Inspect Element tool to review the BIM metadata you brought into Prospect from Navisworks. Pulling this information into the conversation adds a degree of accuracy and specificity to your meetings, and also allows you to flag elements for further review and Reports (more on those below!).
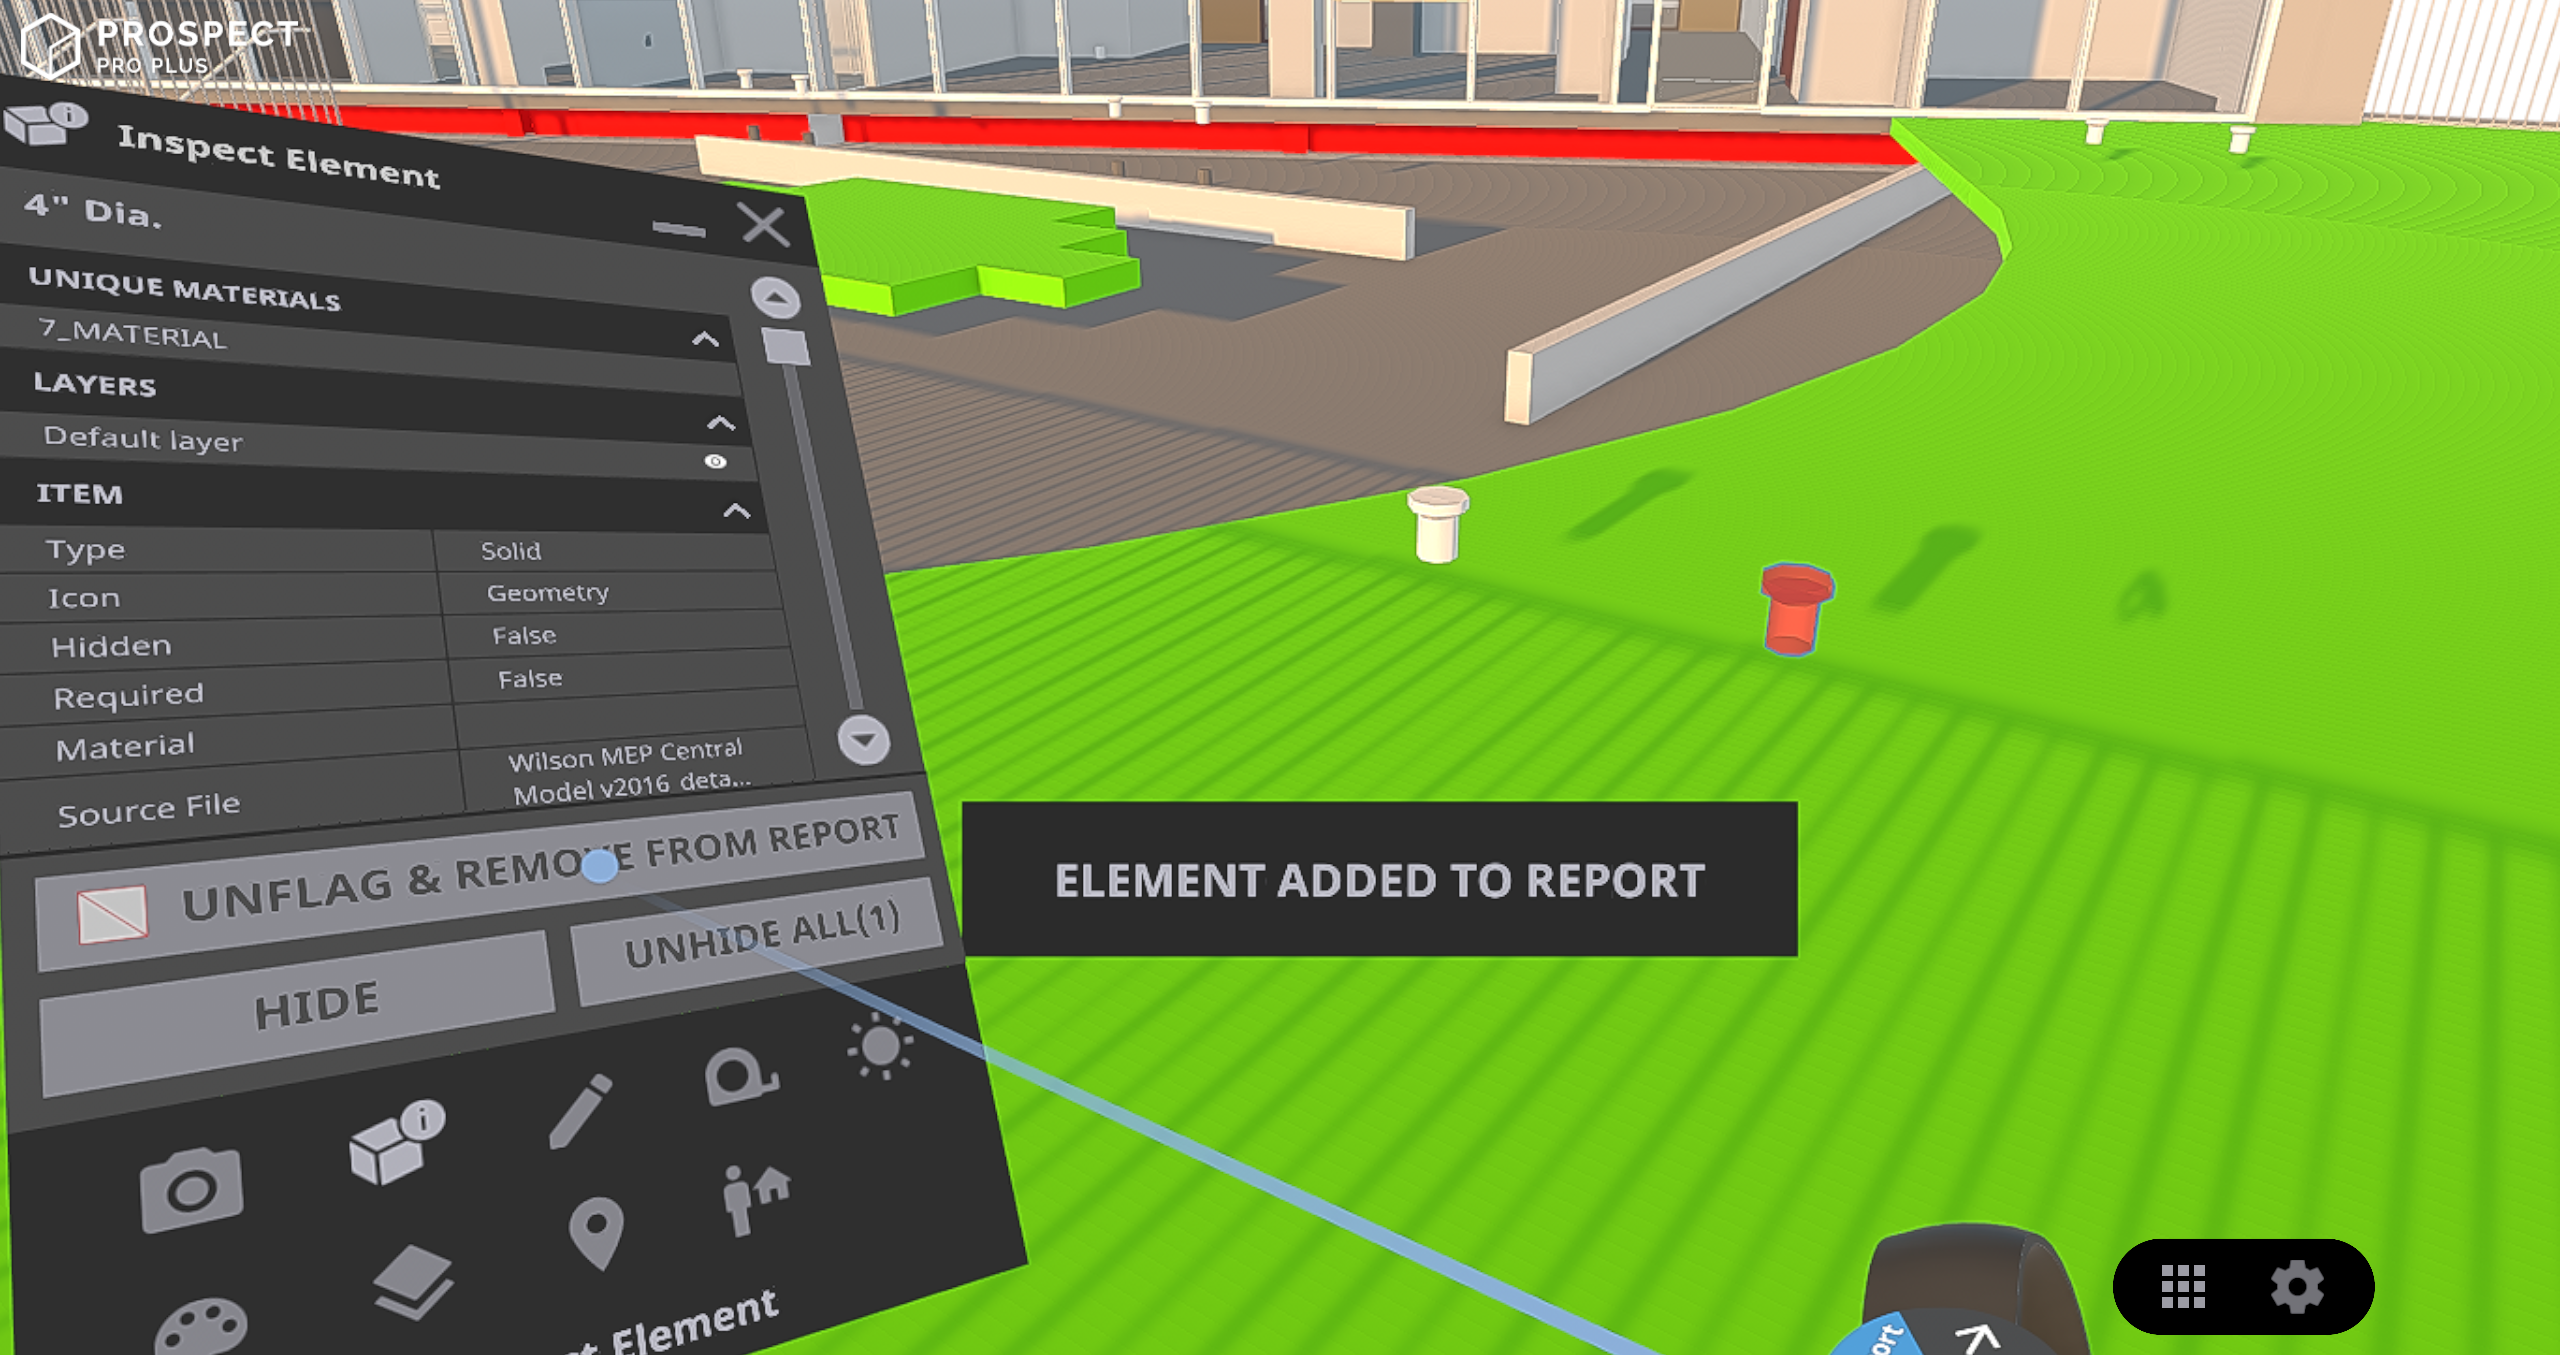
With Inspect Element, view any individual object's BIM metadata properties—and flag the element for later review.
This feature is crucial to the VR workflows of several firms, including Exergy Solutions.
As Scott Hunter, Project Coordinator, puts it, “It’s imperative that we are able to view and interpret full data sets in our large plant model reviews. Metadata such as pipe specs and structural specs allow for team members to discuss design and engineering parameters in real time with all the ammunition they need to make important decisions.
Without metadata in VR, our plant sessions are just pretty pictures. No longer do we have to switch back to our 2D PIDs to extract the vital spec data that we need. Having this all in one virtual experience is a game changer.”
10) Work on your Report for after the meeting in real time.
Prospect automatically exports PDF Reports including Screenshots, Flagged Elements, and other high-level information about actionable items discussed and uncovered while in VR.
This can be used as meeting notes to keep track of issues during the development of a project, and is also an excellent resource to circulate after a meeting adjourns to help trades set to work on any resulting action items.
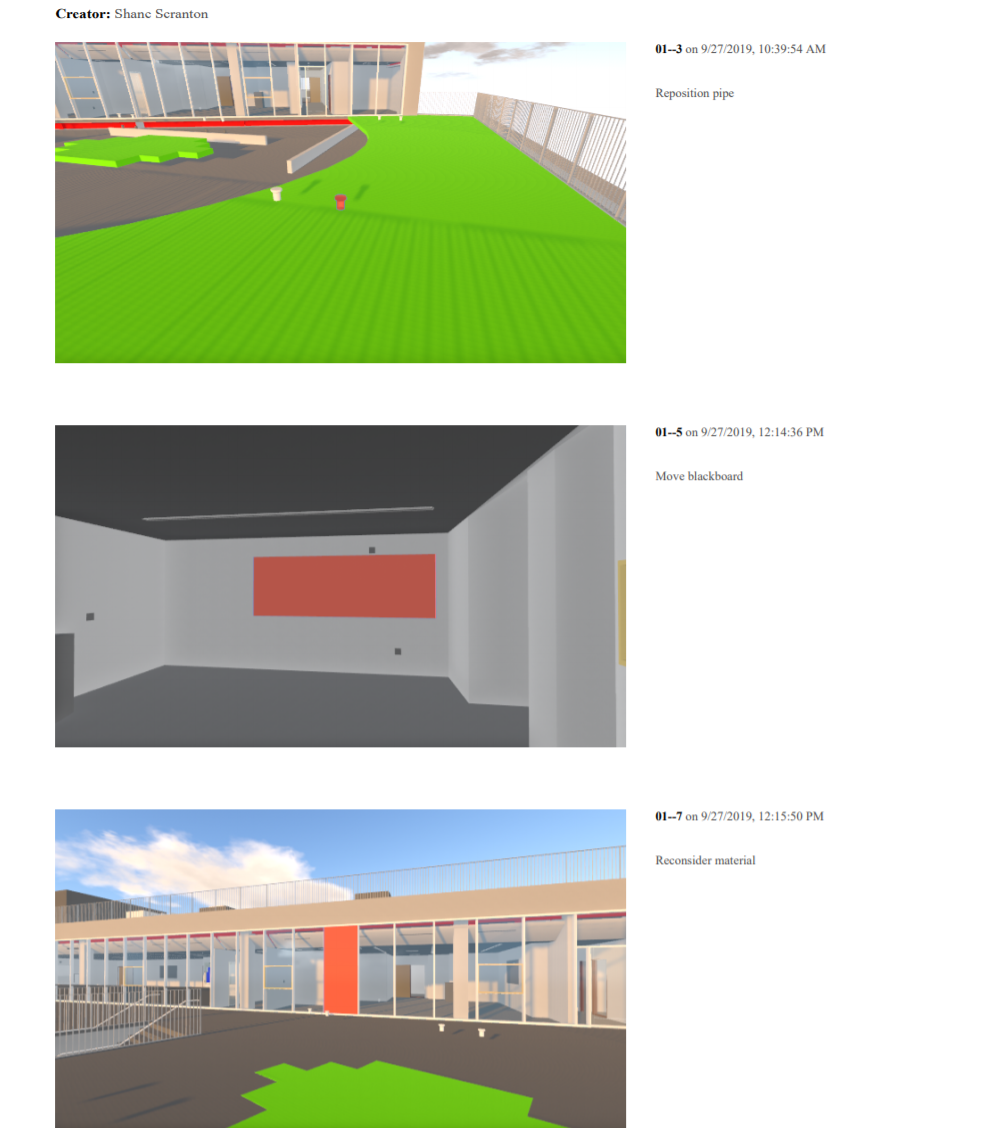
With Prospect's automatically generated PDF Reports, you and your collaborators can always walk away from VR coordination meetings with actionable next steps.
Pro Tip: To add any additional notes to your report during your VR meeting, simply have a colleague follow along on the PC that’s plugged into your headset. They will be able to add notes to the Report in real time, since flagged elements and screenshots will display in the Reports tab as soon as they are captured in VR.
The note taker can also visually follow along by adjusting the windows so that both the Prospect Desktop Library and the VR session are in view (this will not affect what the user in VR sees).
After the meeting:
11) Export meeting notes to share with project teams.
While your VR meeting itself will be a productive experience for you and your stakeholders, the meeting’s real value comes from having actionable next steps for each collaborator.
If you didn’t have someone taking notes in the Report during your meeting, now is a good time to add them. Simply go to the Reports tab in your Prospect library to add notes to the text box associated with each screenshot and flagged element.
If you ran a model coordination meeting in Revit, you can even export your Report as a CSV and bring that back into Revit to navigate to the individual element IDs of issue items.
Ultimately, VR helps everyone understand and communicate on a level playing field, making for smoother project phasing and more empowered decisions along the way. This workflow is relatively new to the industry, but very efficient. If you've tried it, we’d love to hear from you—let us know in the comments what your experience has been.
