.png?width=212&name=Prospect%20by%20IrisVR%20Black%20(1).png)

The wait is over: Prospect for Oculus Quest is here!
The Oculus Quest is a wireless, portable, and easy-to-use VR headset that doesn't need to be plugged into a computer to run VR experiences. It's a great way to jump from smaller SketchUp, Revit, Rhino, Navisworks, and FBX/OBJ files into VR - the perfect compliment to your HTC Vive, Oculus Rift, and Windows MR headsets, which can power larger, more complex VR experiences.
Bringing Prospect to the Oculus Quest allows for easy, on-the-go design review and model coordination. Whether you're bringing your Quest to client presentations for a 1:1 walkthrough of your model, to the field office for subcontractor training, or to model coordination meetings to perform visual clash detection, the level of accessibility Prospect for Quest offers is invaluable.
If you already have an Oculus Quest and are ready to get started, you can request access to the build below.
*Update, November 2019*: We now support VR meetings for Oculus Quest! With our new collaboration workflows, it's easier than ever to meet with anyone in VR—no matter where they are in the world, or what kind of headset they have access to. Learn more VR meetings for Oculus Quest here.
How to Set Up Prospect for Oculus Quest
Once you’ve got your hands on an Oculus Quest, it’s easy to get started with Prospect. Just follow these 7 simple steps.
1. Download and install Prospect on your desktop computer and log into Prospect. Though you don’t need to plug your Quest into a desktop, you will need a computer to create a VR experience from a 3D model.
2. Set up your Oculus Quest and pair it with your smartphone - for support and help, visit https://support.oculus.com/quest/.
3. With the release of Oculus Quest, we’ve added the ability for Prospect Pro, Pro Plus, and Workstation users to organize single-user Prospect files into Projects. You’ll need to create a Project to view a file on your Quest.
To create a Project, simply click the plus button next to “My Projects,” enter a project name and click “Create Project.”
Now, add some files to your Project.
4. Click the Sync button just below the project name to sync your Project to the IrisVR Cloud - allowing you to access it from your Oculus Quest.
5. Sign up for Prospect for Quest here, then install Prospect on the Quest itself.
6. Log in with your Prospect Pro or Pro Plus credentials. Your synced projects will appear shortly after logging in.
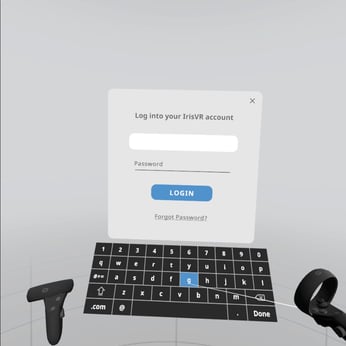
7. Hover over a file to sync the geometry down to your Oculus Quest. Once it finishes, you can jump right in.
Keep reading to find out some of the tools and features we're most excited about bringing to Quest.
In-VR Tools and Features for Oculus Quest
If you’re a Prospect user, you already know our in-VR features make every model review session as productive and collaborative as possible - so you’ll be happy to hear that most of these features are coming to Oculus Quest on day one, such as:
- Markups and Annotations - Call attention to a specific aspect of your model during review or coordination sessions
- Inspect Element - Access all of your file’s BIM metadata while in VR
- Layers - Toggle between different design options in VR
- Viewpoints - Establish a narrative for your project, or jump to the parts of your project that are most important to review (such as Navisworks clashes)
- Screenshots - Capture moments of your VR walkthrough
Ready to step inside your 3D model in VR without plugging your VR headset into a computer? Get started with Prospect for Quest today.
